One of the very frequent use of excel is tracking progress on plan or tasks. Sometimes, it becomes tedious to keep on adding date and followed by remarks or status. This article will try to solve the situation with VBA macro
If you are only interested in getting the macro saved in excel please click on this
This article will cover the followings:
- Working with UserForm in VBA
- Working Principle
- VBA Code for UserForm Actions
- The VBA Module to call UserFORM
- Calling a saved macro module
- Import UserForm and module instead of writing
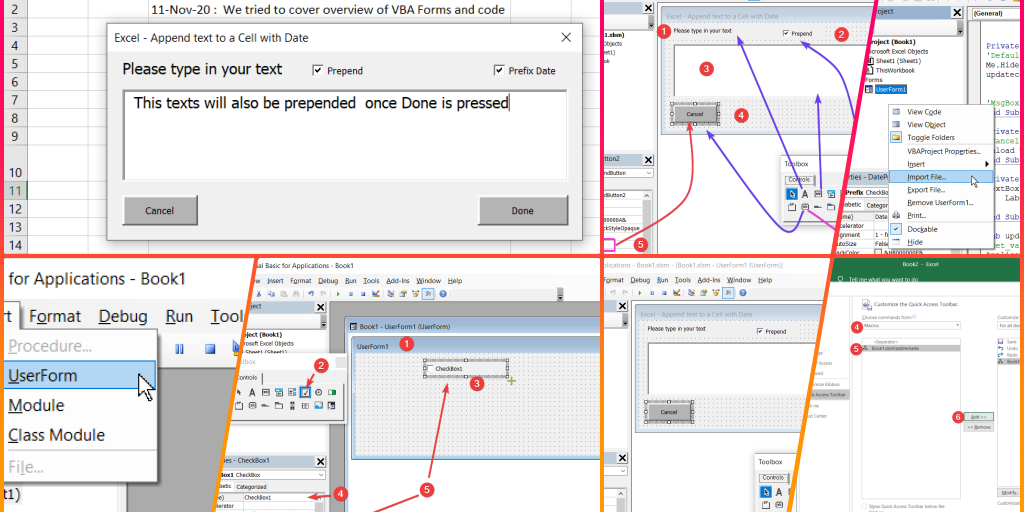
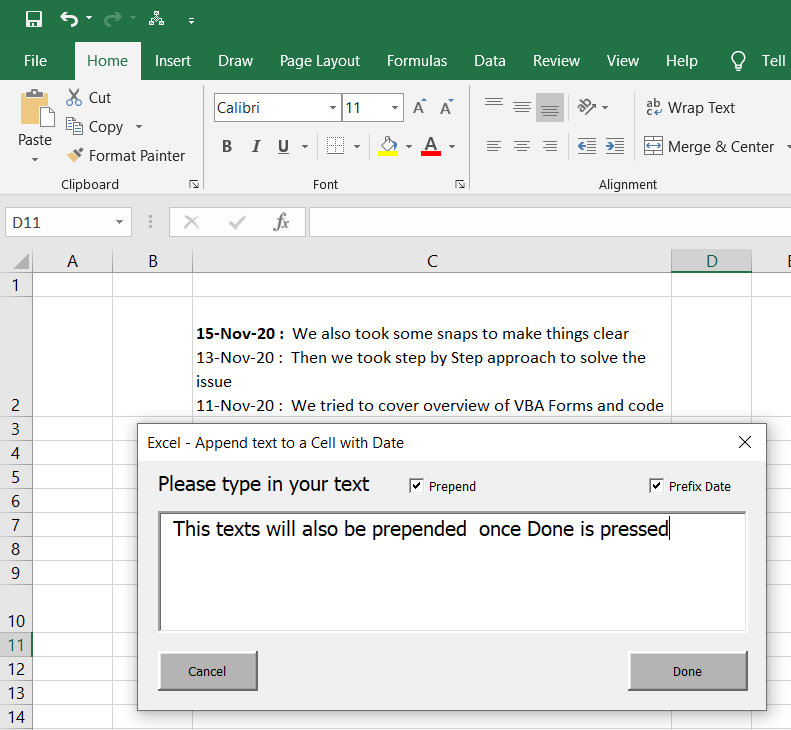
We are going to create a FORM like the following. Sample content after using the FORM is also shown+
To work with VBA macro code, you need Visual Basic Editor, which comes with excel. You can open it by pressing shortcut key combination Alt F11
We will do it in two parts. A form to capture texts with option to prepend or append on the existing cell or option for putting a date before the new texts. The second part is the code that will get executed when a button is clicked
Working with UserForm in VBA
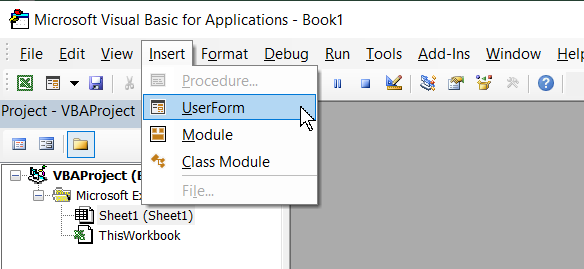
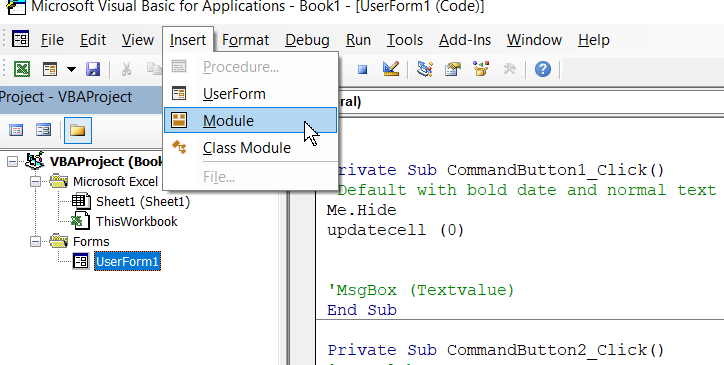
So, lets start with the creation of the FORM. This is done by inserting a UserForm in Visual Basic for Application windows like the following
This will create UserForm1. you may drag it from the corner to resize it according to your choice. Next, we will add some elements to the UserForm. lets start with CheckBox. To do this. you need to first click on the checkbox button in the ToolBox. For some reason if you do not see this on your screen, you can bring this forward from View -> ToolBox.
After clicking the checkbox in the ToolBox, move your mouse to the UserForm1. Click at a point of your choice and drag your mouse to your preferred size and release mouse button. This will create a CheckBox named CheckBox1.
You can change the name of the item from the location marked 4 in the following picture. Similarly, you can also change the caption. Caption is what is what shown on the screen. Name is what is used in the VBA to identify the element. For the subsequent elements, you can change the Caption and Name in the similar fashion as per your preference

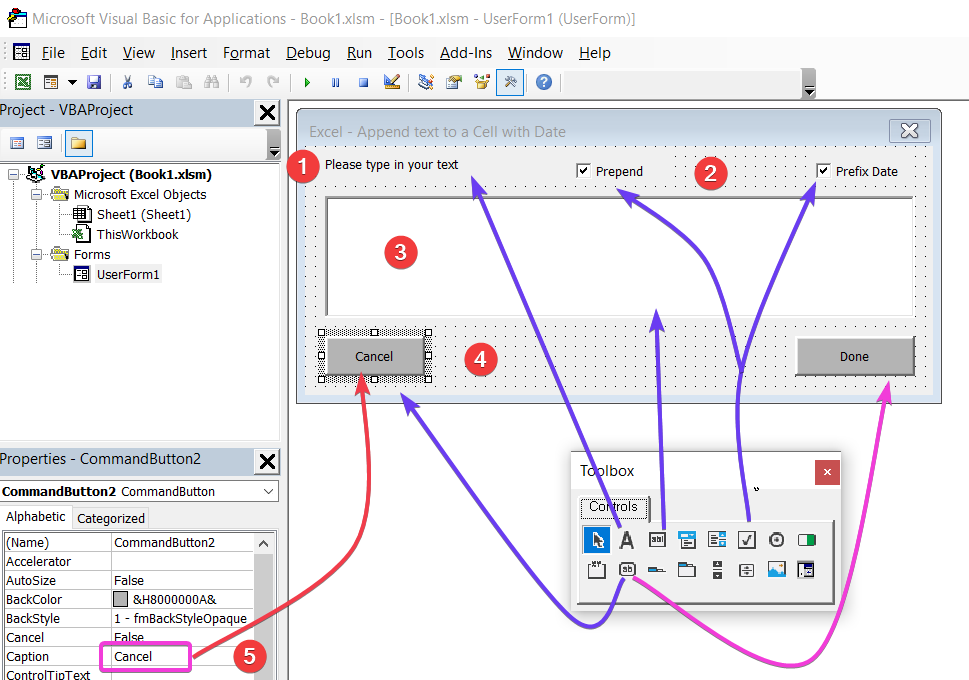
Now, let's continue creating the FORM. We will click on elements on the Please refer to the Numbers in the Picture
- Creating Label - this gives the form a visible text
- CheckBox- we have used two check boxes - one for "Prepend" and the other for "Prefix Date". after creating the textboxes, we have changed Caption to achieve this (shown in step 5)
- TextBox - We dragged for bigger area for the text box
- CommandButton - the last one we created are two Command Buttons and then changed the caption
After we have the FORM built, we have to assign some actions. These actions are normally associated with the Command Buttons. Double-click the buttons , one at a time. This will create a code snippet automatically and you can add your actions there. In our case these actions has created two sections (Sub) Private Sub CommandButton1_Click() and Private Sub CommandButton2_Click().
In addition to this, we need to create a small block of code. I have named it as updatecell()
Working Principle
The first button is CommandButton1 that have caption "Done". when this is pressed, we need to hide the FORM and do the staff. for doing the action, we will have to call the block updatecell()
The second button CommandButton2 that have caption "Cancel". when this is pressed, only action will do is unloading the form
Following are all the modifications of the code in final form
VBA Code for UserForm Actions
Private Sub CommandButton1_Click()
Me.Hide
updatecell

End Sub

Private Sub CommandButton2_Click()
'Cancel button
Unload UserForm1
End Sub

Private Sub UserForm_Initialize()
TextBox1.Font.Size = 12
    Label1.Font.Size = 12

End Sub

Sub updatecell()

Application.ScreenUpdating = False

Set macroBook = Application.ThisWorkbook
Textvalue = UserForm1.TextBox1.Value
If (DatePrefix.Value = True) Then
    TextValueWdate = Application.WorksheetFunction.Text(Date, "[$-409]d-mmm-yy;@") & " :  " & Textvalue
    datebold = 11 ' date string length
Else

    TextValueWdate = Textvalue
    datebold = 0 ' date string length
End If


mytextlength = Len(TextValueWdate)

histextlength = Len(ActiveCell.Value)


If ActiveCell.Value = Empty Then
    ActiveCell.Value = TextValueWdate
    ActiveCell.Font.Bold = False

Else


        ActiveCell.Font.Bold = False
        If (prepend.Value = True) Then
            ActiveCell = TextValueWdate & Chr(10) & ActiveCell
        Else
            ActiveCell = ActiveCell & Chr(10) & TextValueWdate
        End If


End If
If (DatePrefix.Value = True) Then
    If (prepend.Value = True) Then
        dStart = 1
    Else
        dStart = histextlength + 2

    End If

    ActiveCell.Characters(Start:=dStart, Length:=datebold).Font.Bold = True


End If
Application.ScreenUpdating = True

End Sub
The VBA Module to call UserFORM
Now, we have a FORM and actions associated with the buttons defined. But we need a way to launch the FORM itself. This is done by creating a module. Please follow the picture below to launch this. This can be done by Insert->Module
The Module have very limited action. It has to show the UserFORM1 when called and the last action is to unload the FORM
Here is the code:
Sub addremarks()

    UserForm1.Show
    Unload UserForm1

End Sub
Calling a saved macro module
There are several ways that you can call a macro. I will share one of the most handy way. In this way, you can save macro in any of the excel and still call it from any excel.
- Open the Excel where you have the macro saved. In our case, the excel workbook with macro is already open
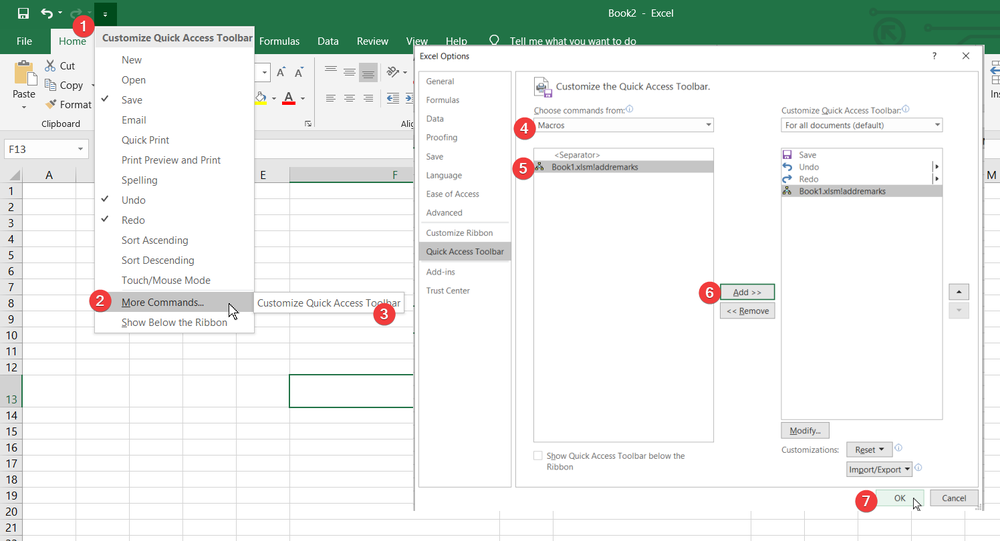
- Follow the instructions from the below picture to add a link to the macro in your Quick Access Toolbar, which is the Top line of Excel Toolbars.
- Click on Quick Access Toolbar
- Click on More Commands
- Click on Customize Quick Access Toolbar
- Choose Macros from the drop-down Choose commands from
- Select the Macro that you want to invoke
- Click on Add>>
- Finally press OK
Now, you should be able to click the new macro from the Quick Access Toolbar
Import UserForm and module instead of writing
Instead of creating UserForm and Macro, you can also import this, if this was exported already
- Download Zip file and extract it
- Launch VBA Code editor by pressing ALT F11
- Click on File in the Menu and click on Import File
- You have to import the .bas and .frm file. Browse to the folder where you have extracted the files
- Follow steps for Calling a saved macro module