
Creating Outlook Search folder
Outlook Search folder can be handy means for you to save time. Think of a situation where you frequently search for emails coming from a particular source or person. You might spend time on searching them based on some criteria again and again or have found out some other means like manual tagging. At these times Outlook Search Folder becomes very handy. Once defined and created, it looks like a normal Outlook folder. But beauty of the Outlook Search Folder is that you do not have to search it again and again manually. emails are already available as they arrive in the Search folder. One thing to be noted here that the Outlook Search Folder does not actually copy the emails to that virtual folder. It is just visible in that folder.
With the default features of searches, it is sometime limited, specially when your expectation is high or you are looking for a complex search scenario. Query Builder comes handy these time for defining the criteria. The Query Builder can you used to join the individual search criteria with AND or OR or combination of both.. But there is a small hiccup. Query Builder does not come enabled by default in outlook. This is a hidden feature that you have to enable it, if you want to use this feature. There are simple steps mentioned in the article Outlook Query Builder for Advanced Search .
Create Search Folder
Easiest way to create a search folder is to do it from the Tabbed Ribbon. Click on Folder and then you have New Search Folder Icon

In the new popup window, please scroll down and choose Create a custom Search Folder. Follow the numbered steps in the picture below
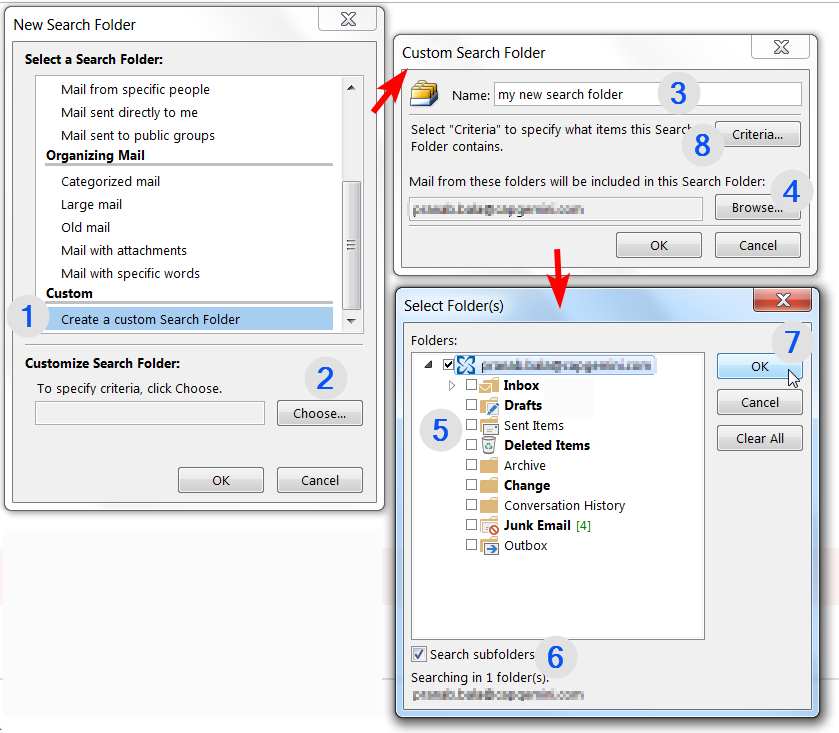
So, by now you have given a meaningful name to the Search Folder and have chosen the folders to be searched. you also selected if you want to search subfolders or not. When all the these are done, please move to the 8th step, which is setting the Criteria and you get a pop-up window for setting the Search Folder Criteria. click on Query Builder Tab. Here you set the advanced criterias.
- Click on the dropdown Field and browse through which field to be in the criteria
- Select the conditions next. Based on the Field chosen, the applicable conditions also changes
- Select the Value for the condition and click on Add to List
You can add one criteria at a time. Once the second Criteria is added, you will see it the Logical Operator Appearing and forming a tree like structure. To change the Operator, select the appropriate from Logical on the right side. You can select Criteria and move up or down suing the button on the right.
Repeat the steps above and when done click Okay.

So, Now you have a New Search folder with advanced search criteria. Imagination would be the limit for covering all your needs. You can also create multiple such Search folders